Even from Windows, Emacs Tramp mode is Terrific

I’m feeling so thankful for the smart people that built tramp.el for emacs. For those who don’t know, tramp refers to “Transparent Remote Access, Multiple Protocols”, and it allows me to use the emacs running on my home laptop, to edit files running on a remote machine that I connect to via SSH. So I can edit files on my raspberry pi, or on my cloud shell machine, or on my remote host at nearlyfreespeech. All from the same emacs. It feels pretty magical at first, and then it just sort of fades into routine, like any sufficiently advanced technology. I don’t even think about it while using it.

Recently I wanted to add a requirement to use a FIDO key authentication to the ssh connection to a raspberry pi device. The server side is pretty easy – just set the proper key into ~/.ssh/authorized_keys . Generating a key is also pretty easy – follow the instructions from Yubico, or from other sources. Support for retrieving a private key from a security key, like a Yubico key, is possible in OpenSSH since version 8.2 (I think). But the OpenSSH on Windows lags a little bit. I think the feature finally worked in v8.9 on the Windows build. The “builtin” OpenSSH that gets installed alongside Powershell is v8.1p1.

PS > c:\windows\System32\OpenSSH\ssh.exe -V
OpenSSH_for_Windows_8.1p1, LibreSSL 3.0.2

Which is not sufficient. What to do?

Upgrade OpenSSH on the Windows machine, of course. You can get releases here. I installed v9.2.2.0. That allowed me to run ssh-keygen from a terminal to generate a key using type ecdsa-sk, and then store it on the Yubico key. And I could also run ssh from the terminal to connect into the rpi, after confirming my presence by touching the security key. All good. The only trick here was to insure I was using the correct version of OpenSSH. The newly installed OpenSSH did not overwrite the version in \windows\system32. Instead it appeared in program files:

PS > c:\progra~1\OpenSSH\ssh.exe -V
OpenSSH_for_Windows_9.2p1, LibreSSL 3.7.2

The next trick was persuading tramp.el in emacs to use the appropriate executable. This is done by twiddling the tramp-methods variable. For me, this worked:

(setf
(car (alist-get “sshx” tramp-methods nil nil #’equal))
‘(tramp-login-program “C:/Progra~1/OpenSSH/ssh.exe”))

And then, set up my ~/.ssh/config, and after that I can use a filespec like /sshx:rpi:/home to open a remote file, after confirming with a touch on my security key.

It’s satisfying when things work.
Cloud Run instances may shutdown at any time

A bit of a surprise for me, I thought I’d note it down. I’ve been using Cloud Run for serverless hosting of containerized apps. The whole experience is really slick. I can provide a source directory for something like a Java app or a nodejs app, and Cloud Run will build the container for me, when I use something like

gcloud run deploy my-service –source . –allow-unauthenticated –region us-west1

You can also set minimum and maximum instances with these options:

–min-instances 1
–min-instances 2

But what is “minimum” anyway? What I did not realize is this fact, taken from the Cloud Run documentation:

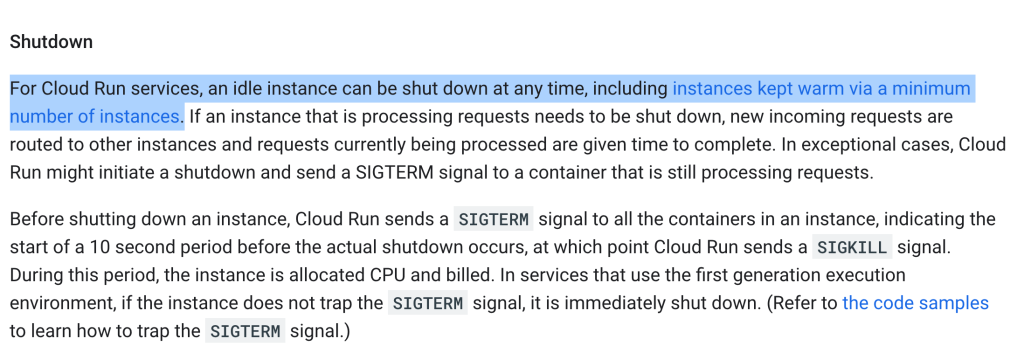
For Cloud Run services, an idle instance can be shut down at any time, including instances kept warm via a minimum number of instances.

You have been warned.

What this means to me is, I need to design my services so that they can always start up, and re-configure themselves. Any state they maintain in memory needs to be … persisted somewhere, so that in the case of shutdown and restart, that state can be re-applied.

I should not have been surprised by this.

Google Cloud Data Loss Prevention (DLP) for XML data; an example of invoking the REST API

I worked a little bit to decipher the documentation for content:deidentify from Google Cloud. After some trial and error, this is what worked for me.

POST :dlp/v2/projects/:project/content:deidentify
content-type: application/json
x-goog-user-project: :project
Authorization: Bearer :token

{
  "inspectConfig": {
    "infoTypes": [ { "name": "EMAIL_ADDRESS" }, { "name": "PHONE_NUMBER" }, { "name": "URL" } ]
  },
  "deidentifyConfig": {
    "infoTypeTransformations": {
      "transformations": [ {
        "infoTypes": [
          {
            "name": "URL"
          }
        ],
        "primitiveTransformation": {
          "characterMaskConfig": {
            "numberToMask": -8,
            "reverseOrder": true,
          }
        }
      },
      {
        "infoTypes": [
          {
            "name": "PHONE_NUMBER"
          }
        ],
        "primitiveTransformation": {
          "characterMaskConfig": {
            "numberToMask": -1,
            "reverseOrder": false,
            "charactersToIgnore": [
              {
                "charactersToSkip": ".-"
              }
            ]
          }
        }
      },
      {
        "infoTypes": [
          {
            "name": "EMAIL_ADDRESS"
          }
        ],
        "primitiveTransformation": {
          "characterMaskConfig": {
            "numberToMask": -3,
            "reverseOrder": false,
            "charactersToIgnore": [
              {
                "charactersToSkip": ".@"
              }
            ]
          }
        }
      } ]
    }
  },
  "item": {
    "value": "<doc xmlns=\"urn:932F4698-0A64-49D4-963F-E6615BC399E8\">  <Name>Marcia</Name>  <URL>https://marcia.com</URL>  <Email>marcia@example.com</Email><Phone>412-343-0919</Phone></doc>"
  }
}

Notes:

  • As described here, You need to specify the header x-goog-user-project: :project (obviously replacing the word :project with your own project name), otherwise you will get the dreaded 403 error message like this:
    {
       "error": {
         "code": 403,
         "message": "Your application is authenticating by using local Application Default Credentials. The dlp.googleapis.com API requires a quota project, which is not set by default. To learn how to set your quota project, see https://cloud.google.com/docs/authentication/adc-troubleshooting/user-creds .",
         "status": "PERMISSION_DENIED",
         "details": [
           {
             "@type": "type.googleapis.com/google.rpc.ErrorInfo",
             "reason": "SERVICE_DISABLED",
             "domain": "googleapis.com",
             "metadata": {
               "service": "dlp.googleapis.com",
               "consumer": "projects/325555555"
             }
           }
         ]
       }
     }
  • You can specify the de-identify config as a template. example follows:
    POST :dlp/v2/projects/:project/content:deidentify
    content-type: application/json
    x-goog-user-project: :project
    Authorization: Bearer :token
    
    {
      "inspectConfig": {
        "infoTypes": [ { "name": "EMAIL_ADDRESS" }, { "name": "PHONE_NUMBER" }, { "name": "URL" } ]
      },
      "deidentifyTemplateName": "projects/my-project-name-12345/deidentifyTemplates/3816550063387353440",
      "item": {
        "value": "<doc xmlns=\"urn:932F4698-0A64-49D4-963F-E6615BC399E8\">  <Name>Marcia</Name>  <URL>https://marcia.com</URL>  <Email>marcia@example.com</Email><Phone>412-343-0919</Phone></doc>"
      }
    }
    

How to Compute an HTTP Signature for Mastodon (and an example in NodeJS)

I am reading this documentation from Mastodon.

And from it, I understand that Mastodon requires an HTTP Signature, signing at least these headers:
(request-target) host date digest

If your client is written in JavaScript and runs on Nodejs, an example for how to build a signature is given on the npmjs site.

But I believe this example is out of date. It does not use the (request-target) pseudo header. So that’s not gonna work.

So what must you do? Go back to the Mastodon documentation. Unfortunately, that too, is either out of date or confusing. For a post request, the mastodon documentation states that you must first compute the “RSA-SHA256 digest hash of your request’s body”. This is not correct. There is no such thing as “RSA-SHA256 digest”! RSA-SHA256 is not the name of a digest. Message Digests include: SHA1, SHA256, MD5 (old and insecure at this point) and others. According to my reading of the code, Mastodon supports only SHA-256 digests. The documentation should state that you must compute the “SHA256 digest”. (There is no RSA key involved in computing a digest).

Regardless of the digest algorithm you use, the computed digest is a byte array. That brings us to the next question: how to encode that byte array as a string, in order to pass it to Mastodon. Some typical options for encoding are: hex encoding (aka base16 encoding), base64 encoding, or base64-url encoding. The documentation does not state which of those encodings is accepted. Helpfully, the example provided in the documentation shows a digest string that appears to be hex-encoded. Unhelpfully, again according to my reading of the code, Mastodon requires a base64-encoded digest!

With these gaps and misleading things in the documentation, I think it would be impossible for a neophyte to navigate the documentation and successfully implement a client that passes a validatable signature.

  1. produce the POST body
  2. compute the SHA-256 digest of the POST body, including all whitepsace and leading or trailing newlines. Try this online tool to help you verify your work.
  3. Encode that computed digest (which is a byte array) with base64. This should produce a string of about 44 characters.
  4. Set the Digest header to be SHA-256=xxxyyyyy , where xxxyyyy is the base64 encoding of the SHA-256 digest.
  5. Set the http headers for the pending outbound request to include at least host, date, and digest.
  6. compute the signature following the example from the npmjs.com site, with headers of “(request-target) host date digest”, and using the appropriate RSA key pair.

If it were me, I would also include a :created: and an :expires: field in the http signature.

You can play around with HTTP Signatures using this online tool. That tool does not yet support computing a Digest of a POST body, but I’ll look into extending it to do that too.

Let me know in the comments if any of this is not clear.

I posted a working example for Nodejs as a gist on Github.

It depends only on nodejs and the builtin libraries for crypto and URL to compute the hash/digest and signature. It does not actually send a request to Mastodon; that is left for you to do.

Yarp vs Envoy proxy – build time comparison

I’m doing some self-education these days, and was exploring YARP today. I learned about this via HackerNews some time ago, and only now got around to taking the time to explore in more detail. As Microsoft describes it, YARP is “a library to help create reverse proxy servers that are high-performance, production-ready, and highly customizable.”

It’s not a reverse proxy in its own right, but a library that you can embed into an ASPNET app to allow it to act as a reverse proxy. The “Yet Another” moniker is completely appropriate; there are many, many Reverse Proxies out there in various shapes, sizes and configurations. Why Microsoft wanted to build another one when there are good options out there – Envoy, nginx, haproxy, and many others – is perhaps a topic worth exploring (Google, my most recent employer, promotes the open-source Envoy proxy as a general-purpose RP, and also sells an API Platform, Apigee, that includes its own reverse proxy). It seems to me that Microsoft has large cloud investments, and wants to have control over this particular critical piece of widely-used infrastructure. Rather than compromise with something that’s already out there, go build something that fits the requirements for their massive cloud footprint, as well as for the shops other than Microsoft who are invested in .NET. I don’t think it’s worthy of too much more discussion than that.

With so many available options in reverse proxies, an interested observer might want to have some insight into comparisons between them. Now there are various criteria a person might want to investigate when comparing – features like hot-reload of configuration, the configuration model in general, support for “farms” of proxies all centrally managed, platform availability, performance…. Any reader could probably add two or three more items to that list.

All of that is interesting, but I don’t have time to conduct a thorough comparison at this time. But I will offer one quick observation. While exploring Envoy proxy back in November, I built it from source on my macbook pro. The build was a bear, and took maybe 90 minutes? Something like that. Basically it built every library that the envoy proxy depended on. I suspect most people don’t do that; they just use the docker container that the envoy project publishes.

Just for fun I cloned the yarp repo and ran a build. After sorting out some puzzles [1, 2] on my own, the build completed in about 55 seconds. That’s a pleasant surprise.

I know that with Bazel, the envoy build will be much faster on subsequent runs. But even so, building a YARP proxy is much much faster than building Envoy.

APIs, microservices, and the service mesh

Got some time and want to learn about APIs, microservices, the service mesh, and how these pieces interplay in an enterprise?

Here’s a session Greg Kuelgen and I delivered at Google Next 2019.
Hero image

Youtube video

Summary: If you’ve got more than a handful of services intercooperating, you’re gonna want a service mesh infrastructure. And you will want to use API Management to share APIs outside of the team that developed them.

nodejs on Google App Engine – forcing HTTPS inbound, via HSTS

How can I force my nodejs app running on Google App Engine, to always redirect to HTTPS ?

I have a pretty vanilla app that looks like this:

This thing is running in Google App Engine (GAE), and I’d like to make sure it listens only on HTTPS. There are standards like HSTS that can help. How can I use them?

This question and answer on Stackoverflow showed me the way. Basically, just add in a tiny module called yes-https. The new code looks like this:

Redeploying (no change to app.yaml) gets me the always-HTTPS behavior I want. When a client requests my service via http, it receives a 301 redirect pointing to the secure site.

HTTP/1.1 301 Moved Permanently
Date: Wed, 20 Jun 2018 16:27:56 GMT
Transfer-Encoding: chunked
X-Powered-By: Express
Location: https://foo-bar.appspot.com/
Via: 1.1 google

Nice, easy, clear.
Thanks to Justin for this handy module.

Jackson and XmlMapper – reading arbitrary data into a java.util.Map

I like the Jackson library from FasterXML. Really handy for reading JSON, writing JSON. Or I should say “serialization” and “deserialization”, ’cause that’s what the cool kids say. And the license is right. (If you need a basic overview of Jackson, I suggest this one from Eugen at Stackify.)

But not everything is JSON. Sometimes ya just wanna read some XML, amiright?

I work on projects where Jackson is included as a dependency. And I am aware that there is a jackson-dataformat-xml module that teaches Jackson how to read and write XML, using the same simple model that it uses for JSON.

Most of the examples I’ve seen show how to read XML into a POJO – in other words “databinding”. If my XML doc has an element named “Fidget” then upon de-serialization, the value there is used to populate the field or property on the Java object called “Fidget” (subject to name remapping of course).

That’s nice and handy, but like I said, sometimes ya just wanna read some XML. And it’s not known what the schema is. And you don’t have a pre-compiled Java class to hold the data. What I really want is to read XML into a java.util.Map<String,Object> . Very similar to what I would do in JavaScript with JSON.parse(). How can I do that?

It’s pretty easy, actually.

This works but there are some problems.

  1. The root element is lost. This is an inadvertent side-effect of using a JSON-oriented library to read XML.
  2. For any element that appears multiple times, only the last value is retained.

What I mean is this:
Suppose the source XML is:

<Root>
  <Parameters>
    <Parameter name='A'>valueA</Parameter>
    <Parameter name='B'>valueB</Parameter>
  </Parameters>
</Root>

Suppose you deserialize that into a map, and then re-serialize it as JSON. The output will be:

{
  "Parameters" : {
    "Parameter" : {
      "name" : "B",
      "" : "valueB"
    }
  }
}

What we really want is to retain the root element and also infer an array when there are repeated child elements in the source XML.

I wrote a custom deserializer, and a decorator for XmlStreamReader to solve these problems. Using them looks like this:

String xmlInput = "<Root><Messages><Message>Hello</Message><Message>World</Message></Messages></Root>";
InputStream is = new ByteArrayInputStream(xmlInput.getBytes(StandardCharsets.UTF_8));
RootSniffingXMLStreamReader sr = new RootSniffingXMLStreamReader(XMLInputFactory.newFactory().createXMLStreamReader(is));
XmlMapper xmlMapper = new XmlMapper();
xmlMapper.registerModule(new SimpleModule().addDeserializer(Object.class, new ArrayInferringUntypedObjectDeserializer()));
Map map = (Map) xmlMapper.readValue(sr, Object.class);
Assert.assertEquals( sr.getLocalNameForRootElement(), "Root");
Object messages = map.get("Messages");
Assert.assertTrue( messages instanceof Map, "map");
Object list = ((Map)messages).get("Message");
Assert.assertTrue( list instanceof List, "list");
Assert.assertEquals( ((List)list).get(0), "Hello");
Assert.assertEquals( ((List)list).get(1), "World");

And the output looks like this:

{
  "Parameters" : {
    "Parameter" : [
      {
        "name" : "A",
        "" : "valueA"
      },{
        "name" : "B",
        "" : "valueB"
      }
    ]
  }
}

…which is what we wanted.

Find the source code here: https://github.com/DinoChiesa/deserialize-xml-arrays-jackson

Hat tip to Jegan for the custom deserializer.

medialize/URI.js – why’d you go and get all fancy?

I have relied on URI.js from medialize for years.

I downloaded it a long time ago, and it just works. It’s handy for parsing and building URIs form within Javascript.
I happen to use nodejs often, but I also use a JavaScript engine that runs in the JVM (via Rhino or Nashorn). So I liked URI.js for its usability across those systems.

Recently I decided to download “the latest and greatest” URI.js, and what I found… did not make me jump for joy.

URI.js is no longer “just downloadable”.

Where before I could just download the raw JS file, URI.js now has a builder that allows me to select which options I wish to include. I get the concept, and it’s a nice idea, but when I de-selected every option, I got a minimized URI.js that I did not want. When I went to the source tree I found a URI.js that included all the require() statements for punycode, Second-Level Domains, and ipv6, all stuff I did not want.

*snif*

I couldn’t figure out how to get it to “just work” in nodejs without all of that, so I had to resort to manually changing the code. Basically I just removed all the require() statements for those unneeded / unwanted modules.

And it works.

It’s possible I’m missing something basic, but for sure, it got more complicated to get the simple solution. Seems like a step backward.

Do you use curl? Stop using -u. Please use .netrc

An unsolicited tech tip.

Those of you who are API people, should exhibit good API hygiene.

One aspect of that is: “stop using curl -u” !!

Sometimes you have the urge to run a command like this:
curl -X POST -v -u 'yourusername:password' . https://foobar/slksls

Avoid this.

OK, ok, I know sometimes it’s necessary. But if you have an API endpoint that you often tickle with curl, and it accepts credentials via HTTP basic auth, you should be using .netrc to store the credentials.

The problem with using -u is that the password is shown in clear text on your terminal!

OK, I know, you’re thinking: but I’m the only one looking at my screen. . I can hear you thinking that right now. And that may be true, most of the time. But sometimes it’s not.

Sometimes you cut/paste terminal sessions into an email, or a blog post, or a bug report. And that’s when your password gets written down and shared with the world.

Treat Basic Authorization headers the same as passwords, because any observer can easily extract your password from that.

You might think that it’s ok to insert credentials in an email if it’s just being shared among your close work colleages. But that’s a bad idea also. Audit trails depend on the privacy of credentials. If you share them, the audit is gone. Suppose you have a disgruntled (ungruntled? never gruntled?) colleague who decides to take your creds and use them to recursively curl -X DELETE a whole bunch of resources. And the audit trail will show YOUR name on that act.

In short, it’s bad form. It could be forwarded or copy/pastad or it could leak into habit. It sets a terrible example for the children.

Here’s what I suggest:

Option 1: if you use curl

If you have a *nixy machine, create a ~/.netrc file and insert your creds there. See here for information.

chmod the file to 400. When you use the -n option, curl knows how to extract your creds from the file silently. You never have to type credentials on the command line again. I think you can do this on Windows too, but I don’t know curl on Windows.

If you build scripts that use curl, you should allow the user that same option. That way the user never keys in their creds to your script.

When you pass the -n option to curl, instead of -u USER:PASS, it tells curl, “if you ever connect with site.example.com, then use THESE creds” . This works with any HTTP endpoint curl can address via Basic Auth. I have creds for Jira, Heroku, and other systems all in my .netrc.

Hint: also don’t use curl -v, because that will show the basic auth header. You probably want -i anyway, which is less verbose than -v.

Option 2: don’t use curl

Use some other tool that hides the credentials completely.
I think Postman doesn’t quite hide the creds completely. So be careful!

Let’s all try to exemplify good security behavior.